Thursday, 12 November 2020

Tuesday, 20 October 2020
Prototype: Working Website with one link page - evidence and intentions
https://saundersbilly22.wixsite.com/mysite


Wednesday, 14 October 2020


Tuesday, 15 September 2020
Supporting Evidence: Using Layer Masks For Issue 2
This is the image I would have used for issue 2:

First, pick the image you want to edit

Then select another image that you are going to implement into the first image

Duplicate the first image to make a layer of it (the background wont work for this)

Select the quick selection tool and highlight the area you want to replace (in this case, it's the sky)

Then select 'add mask' at the top of the layers section to create a layer from what you highlighted

Select the image you want to implement

Drag it over the first image that is in the photo bin

Stretch the newly added image to cover the area that is going to be replaced
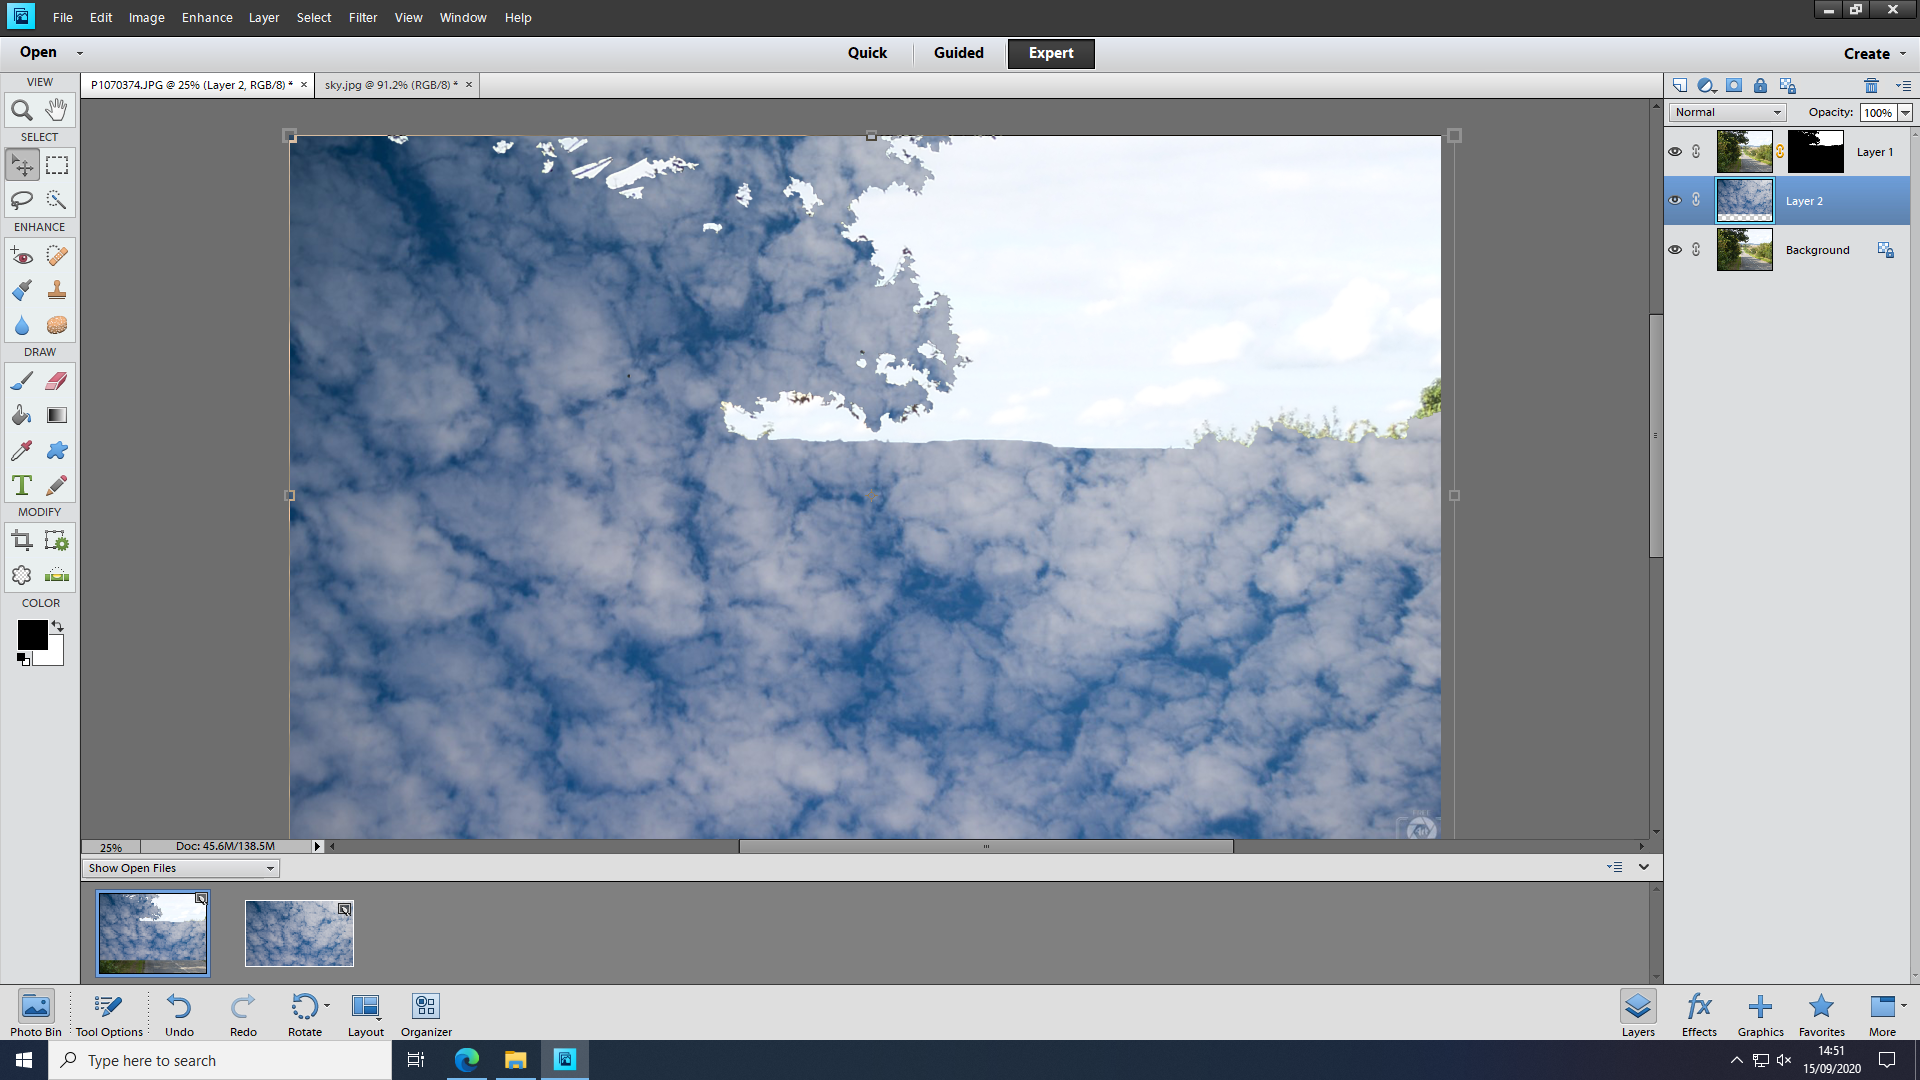
Move the layer containing the image under the layer that contains the mask

Press CTRL + I to switch how the layer works
This image did not work as well as I thought it would because there are lots of small gaps and the lighting does not match, if I used a simpler image, the result would have looked a lot better! This could be used to replace backgrounds on models or add details / extras to a magazine. Removing the background would also allow you to add a text wrap (where the text follows the shape of a picture).
The layer mask "blocks" part of the picture off and inverting it changes which part is effected
Supporting Evidence: Editing For My Website

Once Again I started by cropping the image to remove any unnecessary details (Such as the lamp on the right)

I then changed the brightness to exaggerate the sun through the trees
I did not change anything else as it was not needed and made the image look worse
Subscribe to:
Comments (Atom)